Friday, August 31, 2012

DIY Footie Pajamas

So I finally finished another project off of my list.  My super secret belated Christmas/birthday (okay, now belated birthday gift too) was a pair of pajamas for a friend. (And, if you're anything like me and it takes forever to finish a project in the limited free time you have, you're already late if you want to make a pair of these for Christmas.)

These new pajamas are not just any pajamas.  These pajamas are a one-of-a-kind pair of footie pajamas.

Excitedly awaiting cool nights to wear these awesome jammies.

For well over a year, I've known that my fiance's friend has wanted footie pajamas.  So on Black Friday, I found some material (the puppy paw print made sense at 4 am) and found my patterns.  There was no pattern for footie pajamas, but my mom discovered a one-piece pajama pattern, and my sister-in-law who is into costuming was buying a pattern for fabric shoes.  Perfect combination.

So I'll walk you through the process describing the alterations I made to the method.

I began with McCall's pattern M6251 (jumpsuit) and Butterick pattern 5233 (footies).

I cut out the pieces for Jumpsuit E from the M6251 pattern.  I cut all the pieces as directed, but cut the neck binding (piece 13) from the same binding material as the sleeve bands (this was done from a personal preference to have this instead of using the same fabric).  You do not need the leg band (piece 15) as you will be attaching the footies.

For the footies, cut the pieces for footies E (you do not need the fringe piece- piece 11 or binding).  On the back piece (piece 9), I did not cut the notch in the back, but rather cut straight up from the bottom piece since I would be sewing the whole thing together instead of having an open-backed tie shoe.


Follow the jumpsuit directions from 1-10.  I skipped step 11 because I  thought it looked nicer without the neck binding folded over since I used the rib binding.  So I just tucked the edges in and tacked them to the collar to give it a finished look.

Continue with steps 12-15.

Move on to the footies.  Follow steps 35-38.

With right sides together, pull the footie over the outside of the leg, lining up the center of the top of the foot with the notch on the front of the leg.  Sew this together.


Pull the leg so that the whole thing is inside out.  Sew the sole to the bottom, following steps 45-46.


After I was finished I put my feet in to make sure they would work (I wasn't sure what shoe size he was but was convinced it was bigger than mine).  I was a little nervous because the feet weren't really big on me, but the fabric had some stretch to it and it worked just fine.

Other words of advice: be careful not to stretch your ribbing too much as it doesn't recover well and will be permanently stretched (another option would be to cut a little smaller to allow for some stretching).

The only other thing I'd consider doing differently is putting something a little more slip resistant on the soles of the feet (my sister told me they make iron on stuff for this? Amazing idea!).


Perhaps the next pair should have a hood on them too.  Or an old-fashioned flap in the hind end, just for giggles.

Monday, June 25, 2012

Baby Bouquet

A little while ago (okay I guess it's been a couple months now) we had a baby shower for a coworker.  We had food and games (and adorable cookies!) We wanted to give her something in addition to the awesome food and excellent company and fun games. Something simple and yet cute. Enter the baby bouquet.

To make a baby bouquet you will need:
Baby washcloths (I also used some burp cloths but I liked the flowers made by the washcloths better)
Tape
Greenery (and Skewers- optional) (the skewers were really helpful with the heavy burp cloths.  I got this particular greenery from Dollar Tree and it eliminated the need for floral skewers for the wash cloths)
Vase
Tissue paper


Directions:
Fold baby washcloths


These ones actually were folded pretty nicely to begin with.  They ended up being folded in quarters.


Do as I say not as I do: tuck in the tag before rolling...


Place the skewer (or greenery if yours is able to act as a skewer as this one) at one end of the wash cloth.  I moved the greenery down so it would be out of the way while I rolled the flower.


Roll the washcloth slightly toward the lower edge to layer the rose.

...or begin rolling at the end with the tag.


Tape the end to hold the flower in place. Cover this tape with floral tape and push up the leaves closer to the flower.


Place the flowers in the vase (if your vase is plastic you may want to put something weighted in the bottom to keep it from being top heavy and tipping over). Add greenery to fill out the vase, particularly if using skewers.

Add tissue and add a bow to the vase if desired.

And now your mom-to-be has a lovely bouquet to remind her of all of the love and support in this new and exciting role she will have!

Monday, April 23, 2012

Making do: Creating a Onesie Cutout Cookie

Last week I was making cookies for a baby shower at work.  My go-to place for cookie cutters (a small bulk food store close to home) had a cute elephant and I found a neat sun-burst cutter that I decided I would use for a lion to fit the shower's jungle theme.  But I really wanted a onesie cookie cutter.  Being the procrastinator I am, I was shopping 2-3 days before I wanted to make the cookies.  No time for online purchases and shipping (and the inevitable $20 I'd throw in the cart with it).  So I got creative.
Baby Shower cookies
I began with a gingerbread woman cutout (I didn't think a gingerbread man cutout would do as it wouldn't give the little middle piece between te legs). However, I found that using a ghost cutter also worked with a little more hand shaping it actually was less rounded.

To begin: roll your dough and cut out the pieces. You don't need to worry about making complete cookies as you'll be beheading them in addition to cutting off the hands and rounding them out to make the leg holes.
Lots of overlapping pieces to cut down on the amount of scraps to reroll.

Peel away the extra dough and move your cookies away from each other to keep from cutting the others.

Create the collar by rounding the neck with a round cutter.
If necessary, shape to make the onesie cookie straighter.  Then round the leg holes with a round cookie cutter.

Cut off the arms to make cap sleeves.
Bake. Decorate. Enjoy!

Yes, this is several somewhat tedious steps and produces lots of scraps, but for the procrastinator, it works.

Some other things I noticed while working:
Instead of a onesie make a dress! Less cutting. And still super cute. (and less messing up the leg holes).  You might want to trim off the feet in addition to rounding the head and cutting the arms into sleeves.  Have a straight-edged dress or make it riffled with a pastry wheel.

Use a fluted round for frilly neck lines and leg holes to make it a little more girly.

Sunday, April 1, 2012

Hats off to you!: Knit Hat

So my first knitting project is a hat.  I looked around for a basic pattern just to let myself get comfortable knitting in the round and using double pointed needles.

I began with this pattern, but had no idea what size my double pointed needles were.  After comparing them to some other needles, I determined they were probably around a 6.  The pattern called for 4.5 mm (size 7), but I wasn't patient enough to wait until I could go get more needles, so I worked the pattern with a set of size 6 double pointed needles.

The pattern is quite simple, beginning with a basic knit 2, purl 2.

Once I got a few inches in, however, I realized that my hat looked like I got off somewhere.

After some thinking, I discovered the problem.  I would always quit at the end of a row.  When knitting in the round, a pearl stitch looks like a basic garter stitch and a knit stitch looks like a pearl stitch on a basic project.  So I put down my project and when I picked it up again, I looked at the stitches below, not where my flowing piece of yarn was telling me was the last stitch, and flipped the project. In the end it did give the hat a neat little edge.

Another alteration I made to the pattern was I did the initial k2,p2 for 18 cm instead of the called for 22 cm. She flips up the brim in this pattern, but I felt it was long enough and was really excited to begin the decrease and finish my hat, so I figured it would be fine without it.

All in all, the pattern was a nice pattern and turned out great.

However, I love the look of a fine yarn with small stitches, so look for a more refined hat in the future!


The pattern:
You will need:
Size 6 double pointed needles
Worsted weight yarn (this used less than half of a skein of your typical Red Heart).


Cast on 100 stitches amongst three of your four needles. Join, being careful not to twist stiches, and place marker (scrap of contrast yarn or a safety pin is fine).
Rib in “knit 2, purl 2” for 22cm
Then: *knit 2, purl 2-together** Repeat to end of round.
Next round: *knit 2, purl 1** Repeat to end of round
Next round: *knit 2-together, purl 1** Repeat to end of round
Next round: *knit 1, purl 1** Repeat to end of round
Next round: *knit 2-together** Repeat to end of round
Next round: knit
Next round: *knit 2-together** Repeat from until 1 stitch before end of round.
Knit 2-together (five times) – 8 stitches remaining
Cut a tail of about 15cm of yarn. Thread it through 8 remaining stiches and draw tight. Stitch inside hat to secure. Sew in loose ends.


Sunday, January 15, 2012

12 for 2012

Like everyone else, I'm in the mood to set goals for 2012. (As much as I'd love to set a crafty goal to complete every week, that would require at least another three hours to the day, every day, all year.) So...I'm going to try to be realistic and set 12 goals for 2012.

1. Make super secret belated Christmas/birthday gift for a friend. (Sorry, it's not even started and I think that on occasion they read this so I'm leaving you with a cliffhanger.) [Update: project is finished!]

2. Finish the quilt for my boyfriend (meant for last August-so I'm really not one for getting things done in a reasonable time frame. Apparently this should be another goal to work on for 2012...)

3. Make caramel corn.  Accomplishing this task will be my greatest accomplishment in 2012, as I've ruined every batch of caramel I've tried to make.
Bacon and Cashew Caramel Corn

4. Super secret Christmas gift for someone this coming year (yeah, sorry, on number 4 and two of them are secrets. Clearly I've hijacked this list and it's for me. You're just reading it to hold me accountable. Granted "super secret Christmas gift" could mean that if I don't finish it, I could tell you "oh hey look I glued this picture to this piece of paper. Isn't it sweet?" Don't worry, I've already shared the details with Tall Girl. She will hold me accountable. And judge me for you if I don't follow through. She won't disappoint.)

5. Shadow boxes featuring stuff from my great grandma's quilting trunk. (Amazingness and awe to follow)

6. Get better at knitting to knit something way more exciting than wash rags and scarfs. Hat? Maybe socks? (errrr...let's not get too ambitious with socks.....maybe that will be 2013. or 2014.) [Finished hat!]

7. Make awesome folded fabric ornaments (notice most of my stuff pertains to Christmas...plenty of time to procrastinate...uh...prepare...)

folded fabric star ornament
Cute, no?

8. Make melted crayon art.

9. Improve my calligraphy. Okay, fine, learn calligraphy. Right now I just write really kinda nice with a pen designed for calligraphy.

10. Ice cream. Lots of ice cream. I'm thinking red velvet right now. But I also really need to satisfy my quest for the most perfect coconut ice cream recipe. Maybe this should be moved to number one. Coconut ice cream is that amazing. [Update: Red Velvet ice cream is amazing!]

11. Home decor project. What? I'm not sure yet. Hopefully I'll be able to move out this year and who knows what I'll need. I'm hoping to maybe find a piece of needed furniture at a garage sale and refinish it or something.

12. Project with my nieces. There are so many options out there I just don't know which to choose. Another to be announced project then. (I can't divulge details lest their gaming parents and computer programmig father decide I'm a bad influence, urging them to be too girly or something) There may be several of these. I just can't help it that these girls are just so cute and fun!

This is from about a year ago, but she only got cuter.  Hard to imagine, right?


And I knew once I really got started with this list I'd end up with a million other ideas so here are some other projects I'd like to do sometime:
New jellies/jams
Make a tshirt quilt from old high school shirts

Saturday, December 10, 2011

Stumped Shopping? Things the Crafters on Your List Never Knew They Needed

Christmas is rapidly approaching, and if your shopping is anything like mine, it's getting to be crunch time.  Or perhaps you're just not sure of what to ask for- you have everything you need, right?

Well, here are a couple ideas for the baker/crafter on your list.  Or maybe some new items you just didn't know you needed.

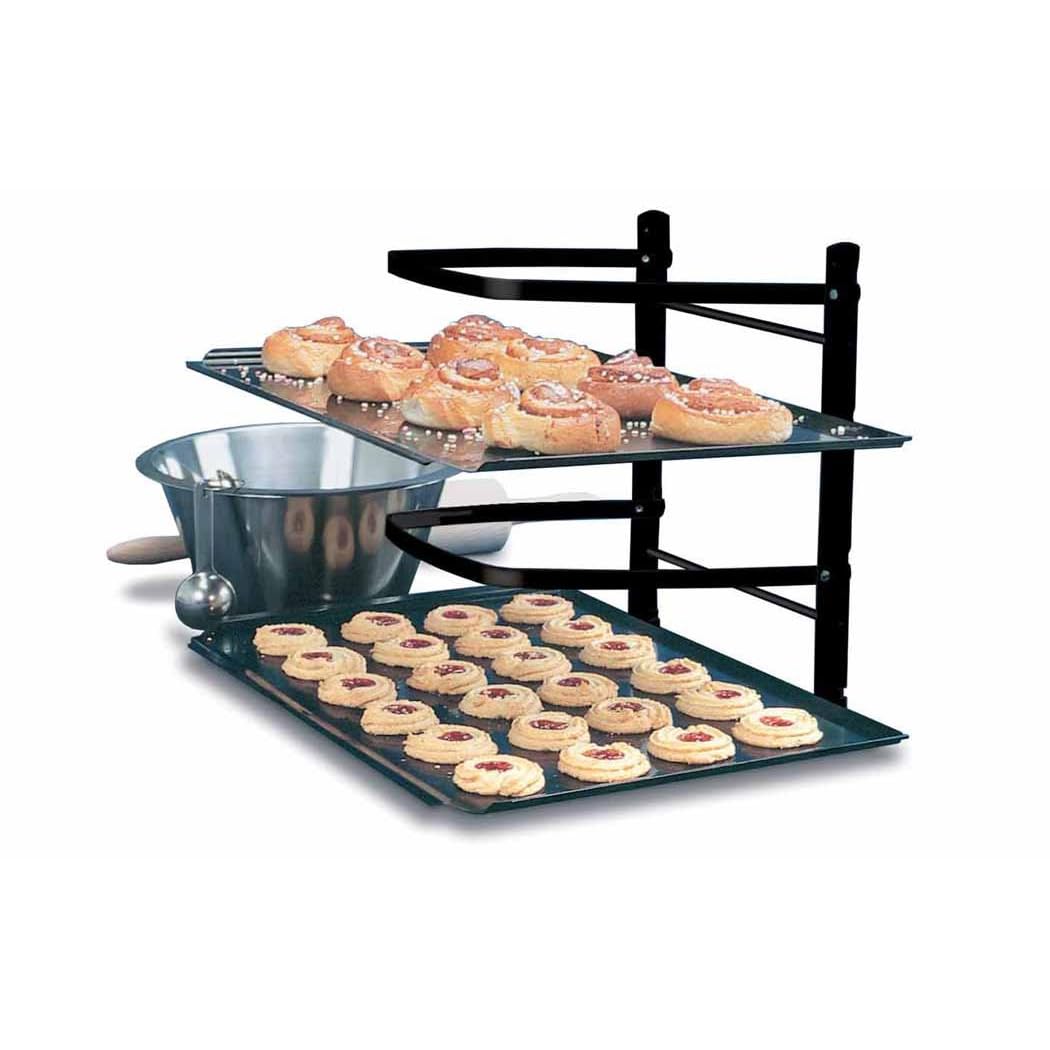
Counter-Saving Cooling Rack
No matter how much counter space you have, you can always use more.  My sister got these cooling racks for me last year for Christmas and I don't know what I would do without them!  I have two, and sometimes even then I wish I had a third.  Such a great space-saver, and folds flat for storage when not in use.  Sometimes the bottom one is a little difficult to fold, but the effort is worth it.

Measure-All Cup
This measuring cup is amazing.  Just push up to the amount you need, fill, and pop it out!  Get every bit of that peanut butter, corn syrup, or shortening you were using without the hassle of scraping it out of the measuring cup.  I like the Pampered Chef one ($10 for the two-cup, $6 for the smaller one-cup)- the Pampered Chef one is unique because it allows you to flip the cup over and use it as a liquid measuring cup and both imperial and metric units (with increments as small as 10 mL and 1 teaspoon).


Quick Turn Fabric Tube Turner
Fabric Tube Turner
This Dritz Quick Turn turns the pain of making straps into a breeze.  The first time I used these I couldn't believe how simple it was.  I had been trying to turn a strap for an apron for my niece, and finally went searching for a tool to help me.  For under $5 at JoAnn's (in our store, not shown online), it made me want to make more aprons.  I know they say you can't buy love, but give this to the crafter on your list and you'll automatically become their favorite person ever.


Stamps - you can get many stamps for $1 at JoAnn's, Pat Catan's, Michael's, and sometimes even the dollar store.  They usually change with the seasons, so there's always something new and different in the dollar section.  If you want to spend more you can get great sets of stamps.  I prefer clear stamps, but still get excited over any stamps I get.

If they already have stamps, how about some cool ink pads?  The glue ink pad with glitter to sprinkle on is on my list this year.

What's on your wish list this year?


Blogger's note: I was not asked to give reviews for any of these products, nor compensated for these reviews.  They're just some of my favorite products that I wanted to share!

Thursday, December 1, 2011

Kids' Book Nook: Making a Pillow for a Bookcase Bench

Earlier I talked about my niece's first birthday and my need to provide somewhat practical gifts- something they won't outgrow quickly- as well as the need for it to be somewhat creative and very personalized.

When my sister-in-law mentioned that they'd like a bookshelf for my niece's room, I began searching the internet for just the right one.  I wanted to make it personal in some way.  They had adorable princess bookshelves and really beautiful maple bookshelves.  Then my creative/practical sides (a dichotomy that surfaces in me quite often) started to voice their opinions.  What if she hates the color pink?  What will she think of this bookcase in five years?  In ten?  If I do anything to personalize this beautiful bookcase I may end up ruining it.  She's a climber- is she going to try to climb to the top shelf?


And then it hit me (okay, maybe browsing at Target helped)- what about a bookcase that's meant to be climbed on?  I liked the one at Target, but I was also attracted to the other cube furniture there that could be used vertically or horizontally, thinking it would be nice to give her something that could be turned upright when she got older and inevitably acquired too much stuff (it happens to everyone, right?).  I began looking for bench bookcases, and it looked like Bed Bath & Beyond had something reasonable, but reviews discussed it needing no tools for assembly, and I became concerned about how sturdy something held together by some two-way tape and a few wooden pegs could be.  I wanted to buy a longer one, but Target only had these in stock, so I bought two (and assembled them myself!).


Then I set off to make the cushion. (I made two)  (More split back pillow and standard pillow case ideas here)

For two ~11 x 23 cushions I used:
1 yard patterned fabric
1/2 yard muslin (I bought the very wide, high quality muslin)
2/3 yard batting

Cut the fabric
For each pillow
Cut two pieces of the muslin 1 1/2 inches longer each way than you want the pillow to be (for mine that was 12 1/2 x 24 1/2 inches)


Cut one piece of the patterned fabric (the front) 1 inch longer than you want the pillow to be (12 x 24 inches)
Cut the back pieces of the pillow- each side will need a half inch seam allowance to hem the seam.  You will also want another inch or two to overlap, so my pieces ended up being 12 x 13 and 12 x 14.
Cut two pieces of the batting to the size you want the pillow to be (11 x 23)
You can cut these on your rotary board if you hold the ruler down tight to the board.


Sew
Fold under and press 3/8 of an inch on one of the shorter sides on each piece of muslin.

With the folds on the outside (your pillow inside out), pin and sew the three remaining sides together with 1/2 inch seam allowance.  Trim the corners and turn the pillow casing right side in.  Put in both thicknesses of batting.

Pin and sew the folded sides together with 1/8 inch seam allowance.

Tack the pillow to keep the batting from sliding while in use.  This can be done by machine or by hand.

I liked the tacking done by hand better because it wasn't as tight.
Back pillow- machine; front pillow- by hand


For the pillowcase
To make the finished edges of your overlapping pieces, fold under 1/4 inch on a shorter edge of each piece of fabric.  Fold under again and press.

Sew along the inner edge of this hem, about a 1/4 inch seam.

Pin these pieces to the front piece, right sides together and overlapping the back pieces.  Sew all four edges with 1/4 inch seam allowance.  Trim the corners and turn right side out.


Put the pillow in the pillow case and place on bookcase.  Tada!  A bench!

And she finally climbed up on it earlier this week.